How Can We Help?
TimelinesAI and Zoho CRM Integration
You may sync new contacts from WhatsApp to Zoho CRM (and CRM Plus) through TimelinesAI-Zoho CRM Integration.
How to setup the Zoho CRM Integration on TimelinesAI
Things to keep in mind before integrating TimelinesAI with Zoho CRM:
- This integration syncs WhatsApp contacts and chats to Zoho CRM
- Only the workspace owner can establish the connection (Master connection)
You’ll see the Zoho CRM section available within the sidebar that’s on the left:
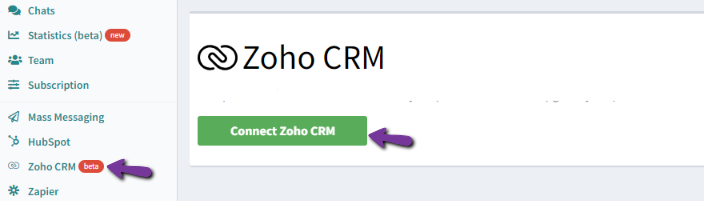
Clicking on the “Connect Zoho CRM” button will take you to an OAuth page where you’ll allow access to your Zoho CRM. After approving the access, you’ll be taken back to the Zoho CRM section on TimelinesAI.
Integration Settings
Now that we’ve established a connection between TimelinesAI and Zoho CRM, we’ll proceed to configure it before activating the integration.
- These steps must be followed to successfully configure and activate your Zoho CRM integration.
You’ll see the following integration settings:
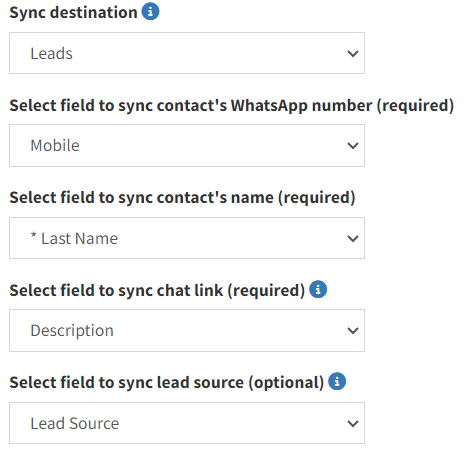
- Sync destination:
Here you’ll be able to select the Zoho CRM module you’d like to have your contacts sync into. It’s important to note that only modules that have a “Phone Number” field will be eligible within this drop-down.
If you don’t see a module that you’d like to use to sync contacts into, then make sure to double-check it has the “Phone Number” field available.
- Select field to sync contact’s WhatsApp number:
This option allows you to determine the field your contact’s WhatsApp number will have – you may select “Phone” or “Mobile”.
- Select field to sync contact’s name:
Like the one above, this drop-down menu allows you to pick the field where your contact’s name will sync into.
- Select field to sync chat link:
This option will allow you to select into which field you’d like your chat link/URL sync to. It’s useful, as it allows you to access the chat thread on TimelinesAI when clicked on. We suggest creating a custom field that can properly identify it for you, so it’s easier whenever you review your contacts information.
- Select field to sync lead source:
The lead source allows you to easily filter out contacts on Zoho CRM. A “TimelinesAI” lead source will be created, thanks to our integration. This will be applied to all contacts created via the integration and it’ll be available to be used in tasks such as Zoho Workflow Rules.
After setting everything accordingly, you’ll see a green “Activate integration” button below. You may click on it to activate the integration, so contacts can sync based on the settings you just configured.
Testing and Modifying the Integration Settings
- Clicking on the “Activate integration” button will create a test contact. If this doesn’t happen, then the system will provide you with an error message indicating the problem that caused it.
- Moreover, when you activate the integration, you won’t be able to edit the settings. You’ll need to click on the “Deactivate and edit settings” button (it’ll show up after you activate the integration), so you can modify the settings accordingly:

- If you modify the Sync destination, then the other settings below will be cleared.
- Lastly, if you refresh (or leave) the page before saving your changes here, the system will clear your fields and forget everything that you’ve set up. Therefore, make sure to always save your changes by clicking on the “Activate integration” button.
How does the integration work?
The integration will match your contacts from WhatsApp and Zoho CRM based on their phone number. If no phone number is matched on Zoho CRM, then a new contact will be automatically created. The contacts created on Zoho CRM will display their numbers in International Format .
- Note: Contacts within Group Chats will not be synced
The created contact(s) will contain the following elements:
1. Contact Owner: It’ll be assigned based on the following:
- The Zoho CRM user (within the Zoho organization account): We’ll match the user’s email address on Zoho with the WhatsApp account owner’s email on TimelinesAI, where the contact came from
- If there’s no match, then the Zoho CRM user that established the connection between TimelinesAI and Zoho CRM will be assigned as the owner of said contact
2. Contact Name: Contacts will be named as “New WhatsApp contact: <phone number>”.
Have in mind that, if the contact is renamed on WhatsApp, the same contact will also be renamed on Zoho
3. Phone: This field will contain the contact’s phone number
4. Lead Source: It’ll be set as “TimelinesAI”
5. Created by: This field will indicate the contact owner, along with a timestamp
6. Description: Here you’ll find the TimelinesAI Chat Link (i.e.: https://app.timelines.ai/chat/7004887/messages/)
WhatsApp Chat Syncing on Zoho CRM Contacts
TimelinesAI will synchronize chats within your Contacts on Zoho CRM. The chats will show up in the Notes section.
- All WhatsApp chat messages that happened during a specific date will be grouped into a Note
- The Note’s title will be set as “WhatsApp Chat with [Contact Name] (DD/MM/YYYY)”:
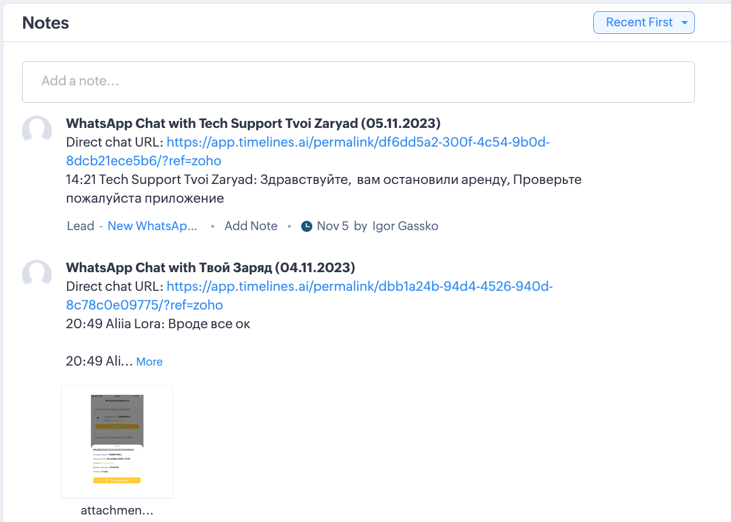
- Attachments: We’ll sync attachments sent within your WhatsApp chats – these will be available in their respective Notes
- Direct chat URL: This link will allow you to check the message on TimelinesAI, by reviewing the chat thread with that contact
If the conversation continues on another date, then the system will create a new Note within that contact on Zoho, detailing the relevant date and grouping all the messages that were sent.
- Send automated WhatsApp messages when any column value changed in board in monday.com - March 15, 2024
- Stay Informed on the Go: Set Up Real-Time Updates from Your Monday.com Board to WhatsApp - March 14, 2024
- Streamline Team Communication: Automated WhatsApp Alerts for New Monday.com Board Items - March 14, 2024